A collection of thoughts about planning, building and enjoying a backyard trail network in central Vermont.

Friday, November 22, 2013

Details

With most of the major items completed (other than getting the rope up) we've been working on the smaller details of the ski tow.  Jay and Kricket spent the morning securing the truck into place using scrap cables, chains and straps.  Galen and I hiked over to check out the progress.  It was a bit slick with the new snow dusting and wet leaves.  Winter is just around the corner.


When we got to the bottom of the hill they were just about done strapping the truck in place.  Tying the truck in place should keep it from moving once we get the tow rope tensioned on the drive wheel.


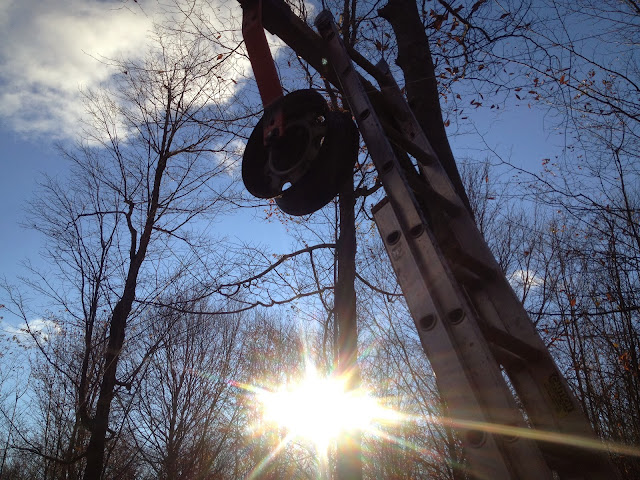
We then hiked up the hill to secure the top bull wheel.


They got most of it done short of two chains/cables plus a come-along to pull in rope slack.

On another note - the rope has been ordered!  It's scheduled to arrive in a few weeks.  Unfortunately it is pricey as heck.  2000' ft of 1 inch multiline twisted lay rope goes for about $1,800.

Ugh...

Still worth it?  Hopefully.


Bull wheel

We had originally planned to suspend the top bull wheel in the air using cables and a come-along for adjustment (as we saw done at the Royalton tow that we had visited earlier).  After realizing how heavy the wheel was  going to be we decided to build a stand to keep it at the right height.  The plan was to build it out of pressure treated lumber but Jay had enough metal scraps to weld a sturdy setup.  I'm amazed at how well Jay can work with metal.  It came out solid.


Here is Jay drilling holes for the side hook connections that we'll use to tie it down.


Jay also made a hitch so we could pull it up the hill using his 4 wheeler.  My dad helped us drag the stand up.  It started off smoothly but once we hit a steep section it was slow going.


The stand kept getting stuck on rocks and stumps.  We even used a come-along at one point to get it up the steepest section.  It took us a little under an hour and half to get it up to the top.

Here is Jay and I getting out the chains and come-along.


Here is Jay and Dad working over a rock in the trail.


We were all relieved to get it up there as it was hard work and nothing broke!  The next step was to create a flat area for the wheel stand.  We used rocks to fill in a large depression.


Here I am getting ready to put the wheel together.


It looked pretty cool once we got it put together.


Dad was psyched to see it in place.


Here is Dad and Jay looking all important with their phones.


We also did a little glade work too.  Here is Dad.


The woods are starting to look very skiable near the top.


It's fun to glade the upper half of the slope as there isn't much that needs to be cut.  Down lower though, where the previous owner logged a little over a decade ago, it is extremely thick and slow going.  We focused on getting a narrow skiable line through this section for now.  There isn't much for overhead tree canopy and because of that you see crowded clumps of pin cherry and moose maple (mostly all 1-4" saplings).  It makes sense to cut these so called "tree weeds" out as there is very little timber value in them when they mature.  We're tyring to thin these trees out and encourage trees like sugar maples and yellow birches to grow.  Sugar maples can establish a nice mature canopy someday and provide a great source of sap for maple syrup!  A mature canopy also helps prevent undergrowth which is ideal for glade management as it keeps dense saplings from growing in so quickly.  After about hour and half of cutting we hiked back up to the top, loaded up the 4 wheeler and hike down the other side back to the house while Jay rode his 4 wheeler back down.


Friday, November 1, 2013

Return and drive wheels

With the return wheels ready to go, the next step was to get them installed.  Carrying a 50lb wheel up a fairly steep hill is not exactly a walk in the park.  We used an aluminum ladder to get the wheels up onto the 4x4 brackets.  Given the amount of weight as well as the reach to get the wheel box out onto the end (so it can slide onto the 4x4) I actually ended up dropping the wheel on the first attempt.  The wheel bent a bit.. Luckily it still worked and wasnt severely damaged.  Phew..

After realizing that this wasnt going to work - I ran back to the house to get a rope and pulley.  The rope and pulley turned out to be a smart idea.  The wheels went on fairly quickly as one person could hold the weight while the other guided the wheel into place.


We were able to get all but one of the return wheels up.  We still need to make one more return wheel for the top bracket.


Jay, Bill and I also worked on getting the truck adjusted and lifted up onto a crib.


Kricket and Galen walked over to see the progress!


We also attached a modified double rim that Bill had welded together for the drive wheel.  For the opposite non-drive side of the truck, Bill also welded a stop bar onto a rim so it would hit the truck frame and lock itself into place.  Here is a short video showing the drive wheel.